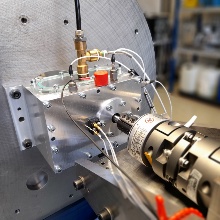
The focus of current research at the Institute of Machine Components at the University of Stuttgart is on pitting damage. In cooperation with SONOTEC, a measurement technology manufacturer specializing in ultrasound, pitting damage on gears was investigated. In the process, damage could be detected well before the failure criterion standardized in DIN 3990-5 which is of an area fraction on a tooth flank surface of 4 %. This is possible with suitable sensor technology. In a series of tests, synthetic pitting damage with area fractions between 0.4 % and 2 % of the area of a tooth flank was examined. In addition to the size of the pitting damage, the speed, torque, and lubricating oil viscosity were systematically varied in the tests. In this way, the detection capability of the pitting damage could be tested under different boundary conditions. Different accelerometers were used to collect sensor data during operation of the gears with pitting damage. Compared to the accelerometers, the pitting damage is clearly visible in the measured data of the T20 structure-borne sound probe from the manufacturer SONOTEC. Particularly in the ultrasonic frequency range above 16 kHz, the pitting damage is clearly detectable with the T20 structure-borne sound probe from SONOTEC. Thus, it is possible to reliably detect even the smallest examined pitting damage with area fractions of 0.4 % of the area of a tooth flank.
Contact

Philipp Häderle
M. Sc.Research Associate

Lukas Merkle
M. Sc.Deputy Head of Drive Technology Department

Martin Dazer
Dr.-Ing.Head of Reliability &Head of Drive Technology Department


